A minimalist kitchen isn't about owning less for the sake of it. It's about giving every item an easy home, so counters stay clear and cooking feels calmer. The good news is that you don't need a full remodel or a custom pantry. A handful of simple tools, chosen to fit your actual space, can make a big difference.
Below you'll find a quick reset plan, measuring tips, and ten tools that keep a kitchen tidy without adding visual noise. Every tool is meant to be found at or under $50, so you can start with one or two and build from there.
Before you buy: a 20-minute kitchen reset
Organizers work best when you've already decided what deserves space. Skipping this step is how drawers end up with neat trays full of things you never use.
- Empty one zone. Pick a single drawer, shelf, or cabinet. Don't tackle the whole kitchen at once.
- Sort into three piles. Keep, relocate, and donate or toss.
- Wipe the surface. A clean, dry space makes it easier to see what size organizer you need.
- Group like with like. Baking tools together, coffee supplies together, and so on.
- Measure before shopping. More on that next.
Tip: If you haven't used something in a year and it isn't a seasonal item, it's a good candidate to leave behind.
Measure first (it saves returns)
Most organization frustration comes from products that are almost the right size. Grab a tape measure and jot these down in your phone:
- Drawer interior: width, depth, and height. Standard kitchen drawers are often around 4 inches deep, but yours may differ.
- Cabinet shelf: width and depth, plus the clearance between shelves. Many cabinets have about 10 to 14 inches of vertical space.
- Under-sink area: width between pipes, plus the height to the lowest pipe or the garbage disposal.
- Wall space: the stretch of backsplash or wall you'd be happy to use, ideally 18 to 36 inches wide.
- Pantry shelf depth: deeper shelves (12 inches or more) work well with bins. Shallower ones suit narrow containers.
When you shop, compare your numbers with the product's listed dimensions, and leave about a quarter inch of wiggle room in drawers.
The 10 tools
1. Expandable drawer organizer
A bamboo or plastic tray that adjusts to your drawer width is one of the most flexible tools you can own. It corrals utensils into clean rows, so you stop digging past spatulas to find a whisk.
- Measure your drawer width and choose a tray that expands to fit snugly.
- Keep daily items (forks, spoons, a few cooking tools) in front. Store rarely used gadgets elsewhere.
- Aim for one compartment per category, not one per item.
2. Clear stackable pantry bins
Clear bins let you see what's inside without labels on every box. They also turn messy shelves into tidy blocks.
- Use a bin for snacks, one for baking supplies, and one for packets like seasoning mixes.
- Pick bins with a width that divides evenly into your shelf, such as two 6-inch bins on a 12-inch shelf.
- Stack only what you reach for less often on top.
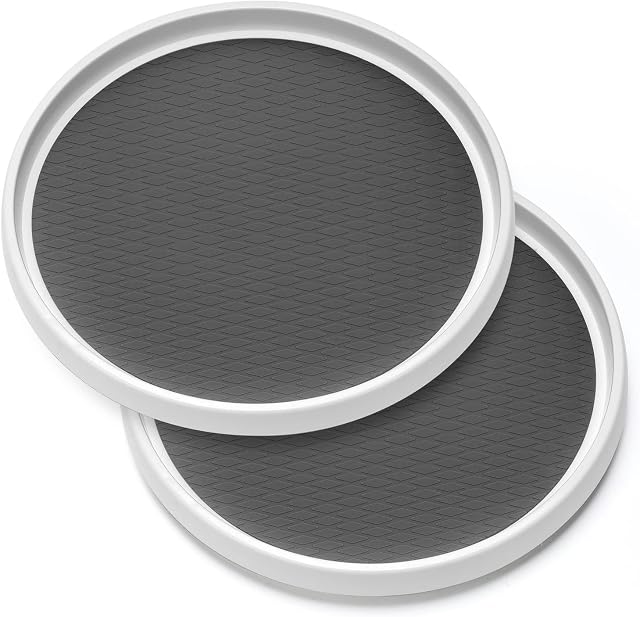
3. Lazy Susan turntable
Deep corner cabinets tend to swallow bottles and jars. A turntable brings the back items to the front with one spin.
- A 9 to 12 inch round model fits many standard shelves.
- Use it for oils, vinegars, sauces, and condiments.
- Keep tall bottles near the center and short jars on the edge so nothing tips.
4. Sliding under-sink organizer
Under-sink space is awkward because of the pipes. A two-tier sliding organizer works around them and gives you a pull-out view of cleaning supplies.
- Measure the width between pipes and the height under the pipes.
- Store sprays on the bottom tier and sponges, gloves, and dish soap on top.
- Put a small bin on the side for trash bags so they don't pile up.
5. Magnetic knife strip
Mounting knives on the wall frees up a drawer or bulky block on the counter, and it looks sleek. Choose a strip that matches your knives' length, often 12 to 16 inches.
- Mount it at a comfortable height, roughly 5 to 6 inches above the counter.
- Keep it away from children's reach.
- Use wall anchors if you aren't screwing into a stud.
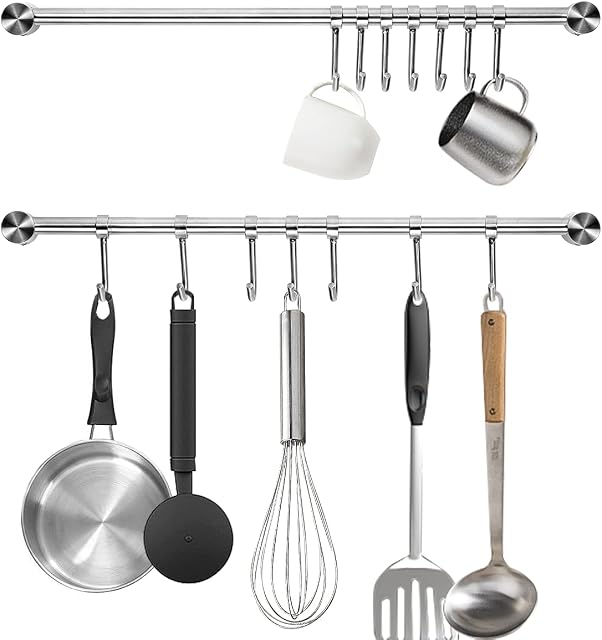
6. Wall-mounted rail with hooks
A slim rail turns a blank stretch of wall into functional storage. Hang a few frequently used items like a ladle, measuring cups, and a pot holder.
- Hang no more than four to six items per 24 inches so it still feels airy.
- Choose a finish that matches your hardware, such as matte black, brass, or stainless.
- Leave some empty space on the rail on purpose.
7. Airtight glass canisters
Matching canisters make pantry staples look cohesive and keep dry goods fresh. They also cut down on the visual clutter of mismatched packaging.
- Start with the items you use weekly, such as flour, sugar, rice, oats, and pasta.
- Choose a size that holds a full bag, typically 1.5 to 2.5 quarts for flour or sugar.
- Use a washable label or a simple chalk marker so everyone knows what's inside.
8. Cabinet shelf risers
Most cabinets waste vertical space. A riser creates a second level, so plates, bowls, or mugs don't have to stack in tall, wobbly piles.
- Measure the clearance first. You'll need room for the riser plus the items on top.
- Put everyday plates on one level and extra bowls on the other.
- Expandable styles can adjust to different cabinet widths.
9. Pot lid rack
Loose lids slide around and make cabinets noisy. A rack, either inside a cabinet door or on a shelf, holds them upright.
- Sort your lids by diameter and see how many you actually use. Many kitchens have lids with no matching pots.
- Choose a rack with adjustable dividers if your lids vary in size.
- Keep it near the stove so you can grab what you need.
10. Tiered spice drawer insert or rack
Spices are small but chaotic. A tiered insert lets you see every label at a glance, so you stop buying duplicates.
- For drawers, choose an insert that angles jars slightly upward.
- For cabinets, a tiered riser about 3 to 4 inches high per step works well.
- Arrange alphabetically or by cuisine, whichever feels natural.
Our picks
Here's a quick guide to the product types we've chosen for this list. Each pick matches the tool with the same number above, so you can jump to the details if you need a refresher.
- Pick 1: Expandable drawer organizer, ideal for utensil drawers and a great first project.
- Pick 2: Clear stackable pantry bins, for grouping snacks, packets, and baking supplies.
- Pick 3: Lazy Susan turntable, for corner cabinets and deep shelves.
- Pick 4: Sliding under-sink organizer, for cleaning supplies and pipe-friendly storage.
- Pick 5: Magnetic knife strip, to free up drawer and counter space.
- Pick 6: Wall-mounted rail with hooks, for everyday tools within reach.
- Pick 7: Airtight glass canisters, for a calm, cohesive pantry look.
- Pick 8: Cabinet shelf risers, to make use of vertical space.
- Pick 9: Pot lid rack, to keep lids upright and easy to find.
- Pick 10: Tiered spice organizer, for a clear view of every jar.
If you're unsure where to start, choose the pick that solves your most irritating daily problem. For many people, that's Pick 1 or Pick 3.
A simple order to tackle everything
You don't have to buy all ten at once. Try this sequence:
- Week one: Drawers and utensils (Pick 1, Pick 5).
- Week two: Pantry basics (Pick 2, Pick 7).
- Week three: Cabinets (Pick 3, Pick 8, Pick 9).
- Week four: Finishing touches (Pick 4, Pick 6, Pick 10).
Spacing it out helps you notice what you really need, and it keeps the project from feeling like a chore.
Keep it minimal over time
Organizers only help if the habits stick. A few easy rules go a long way:
- One in, one out. When a new gadget arrives, pass along an old one.
- Use the 80 percent rule. Fill bins and drawers to about 80 percent so there's room to breathe.
- Do a five-minute reset. Each evening, put things back where they belong and wipe the counters.
- Keep the counters nearly bare. Leave out only what you use daily, like a kettle, a cutting board, or a small plant.
Cozy touches that still feel minimal
A minimalist kitchen can still feel warm. Once the clutter is under control, add one or two soft details:
- A small wooden tray for oils and salt near the stove.
- A linen towel hanging from an oven handle.
- A simple herb pot on the windowsill.
- Warm, neutral containers instead of bright mismatched packaging.
These small touches add personality without bringing the mess back.
Final thoughts
A tidy kitchen doesn't require a big budget or a perfect aesthetic. Start with one zone, measure carefully, and choose tools that fit how you actually cook. Over time, those small changes add up to a space that feels lighter, calmer, and easier to use every day.
Which spot in your kitchen will you tackle first?